Buy Me a Coffee

Tuesday, October 17, 2017

How To Install Jenkins on Ubuntu 16.04

Introduction

Jenkins is an open source automation server intended to automate repetitive technical tasks involved in the continuous integration and delivery of software. Jenkins is Java-based and can be installed from Ubuntu packages or by downloading and running its Web application ARchive (WAR) file — a collection of files that make up a complete web application which is intended to be run on a server.
In this tutorial we will install Jenkins by adding its Debian package repository, then using that repository to install the package using apt-get.

Prerequisites

To follow this tutorial, you will need:
One Ubuntu 16.04 server configured with a non-root sudo user and a firewall by following the Ubuntu 16.04 initial server setup guide. We recommend starting with at least 1 GB of RAM. See Choosing the Right Hardware for Masters for guidance in planning the capacity of a production Jenkins installation.
When the server is set up, you're ready to follow along.

Step 1 — Installing Jenkins

The version of Jenkins included with the default Ubuntu packages is often behind the latest available version from the project itself. In order to take advantage of the latest fixes and features, we'll use the project-maintained packages to install Jenkins.
First, we'll add the repository key to the system.
  • wget -q -O - https://pkg.jenkins.io/debian/jenkins-ci.org.key | sudo apt-key add -
When the key is added, the system will return OK. Next, we'll append the Debian package repository address to the server's sources.list:
  • echo deb http://pkg.jenkins.io/debian-stable binary/ | sudo tee /etc/apt/sources.list.d/jenkins.list
When both of these are in place, we'll run update so that apt-get will use the new repository:
  • sudo apt-get update
Finally, we'll install Jenkins and its dependencies, including Java:
  • sudo apt-get install jenkins
Now that Jenkins and its dependencies are in place, we'll start the Jenkins server.

Step 2 — Starting Jenkins

Using systemctl we'll start Jenkins:
sudo systemctl start jenkins
Since systemctl doesn't display output, we'll use its status command to verify that it started successfully:
  • sudo systemctl status jenkins
If everything went well, the beginning of the output should show that the service is active and configured to start at boot:
Output
● jenkins.service - LSB: Start Jenkins at boot time Loaded: loaded (/etc/init.d/jenkins; bad; vendor preset: enabled) Active:active (exited) since Thu 2017-04-20 16:51:13 UTC; 2min 7s ago Docs: man:systemd-sysv-generator(8)
Now that Jenkins is running, we'll adjust our firewall rules so that we can reach Jenkins from a web browser to complete the initial set up.

Step 3 — Opening the Firewall

By default, Jenkins runs on port 8080, so we'll open that port using ufw:
  • sudo ufw allow 8080
We can see the new rules by checking UFW's status.
  • sudo ufw status
We should see that traffic is allowed to port 8080 from anywhere:
Output
Status: active To Action From -- ------ ---- OpenSSH ALLOW Anywhere 8080 ALLOW Anywhere OpenSSH (v6) ALLOW Anywhere (v6) 8080 (v6) ALLOW Anywhere (v6)
Now that Jenkins is installed and the firewall allows us to access it, we can complete the initial setup.

Step 3 — Setting up Jenkins

To set up our installation, we'll visit Jenkins on its default port, 8080, using the server domain name or IP address: http://ip_address_or_domain_name:8080
We should see "Unlock Jenkins" screen, which displays the location of the initial password
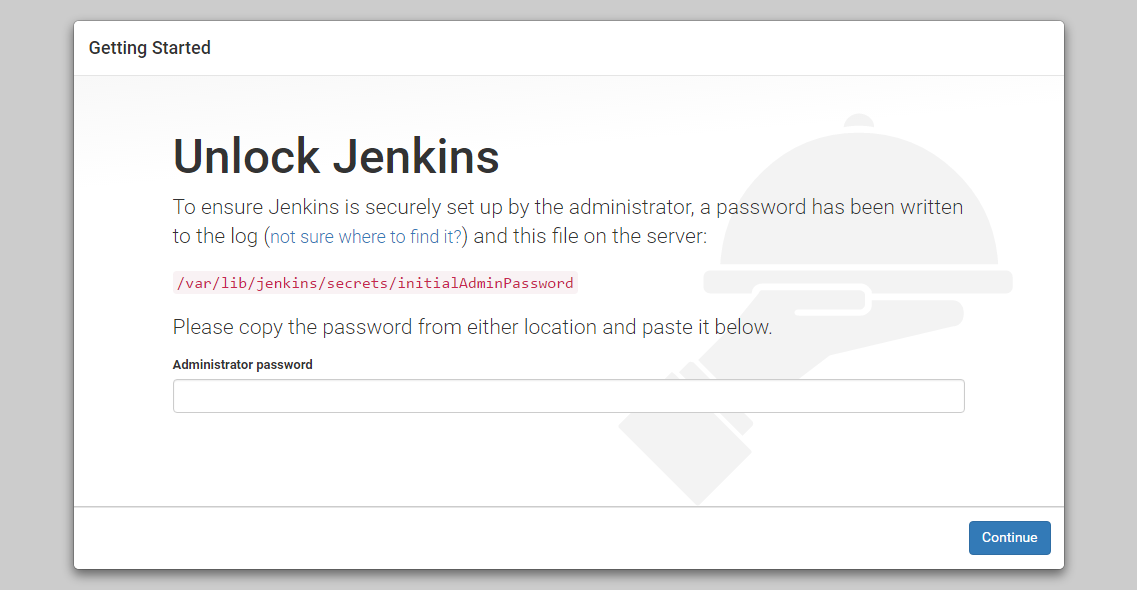
Unlock Jenkins screen
In the terminal window, we'll use the catcommand to display the password:
  • sudo cat /var/lib/jenkins/secrets/initialAdminPassword
We'll copy the 32-character alphanumeric password from the terminal and paste it into the "Administrator password" field, then click "Continue". The next screen presents the option of installing suggested plugins or selecting specific plugins.
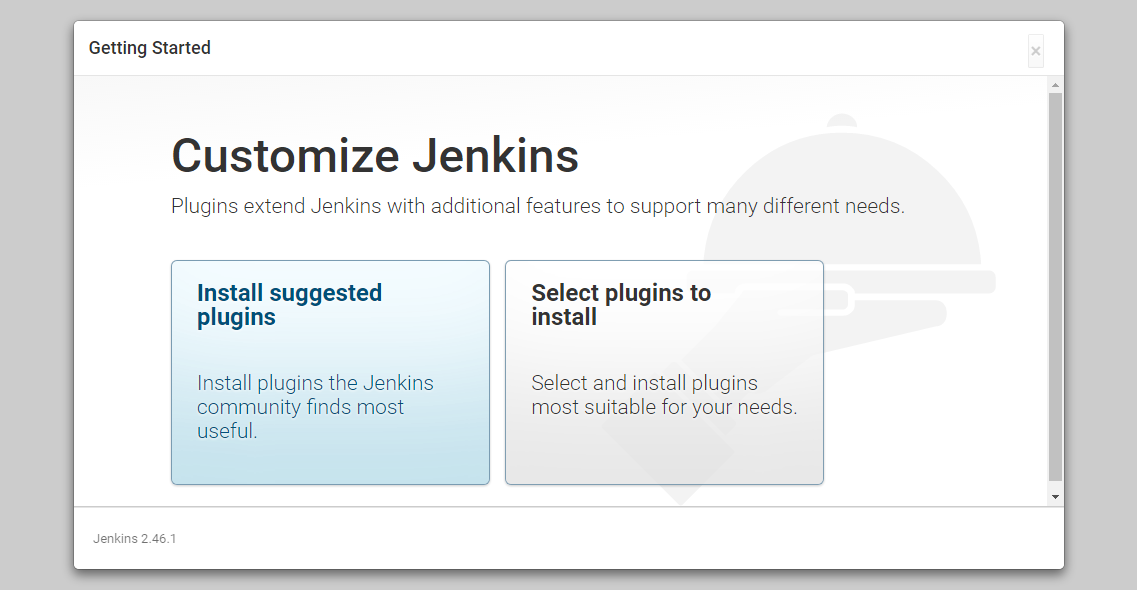
Customize Jenkins Screen
We'll click the "Install suggested plugins" option, which will immediately begin the installation process:
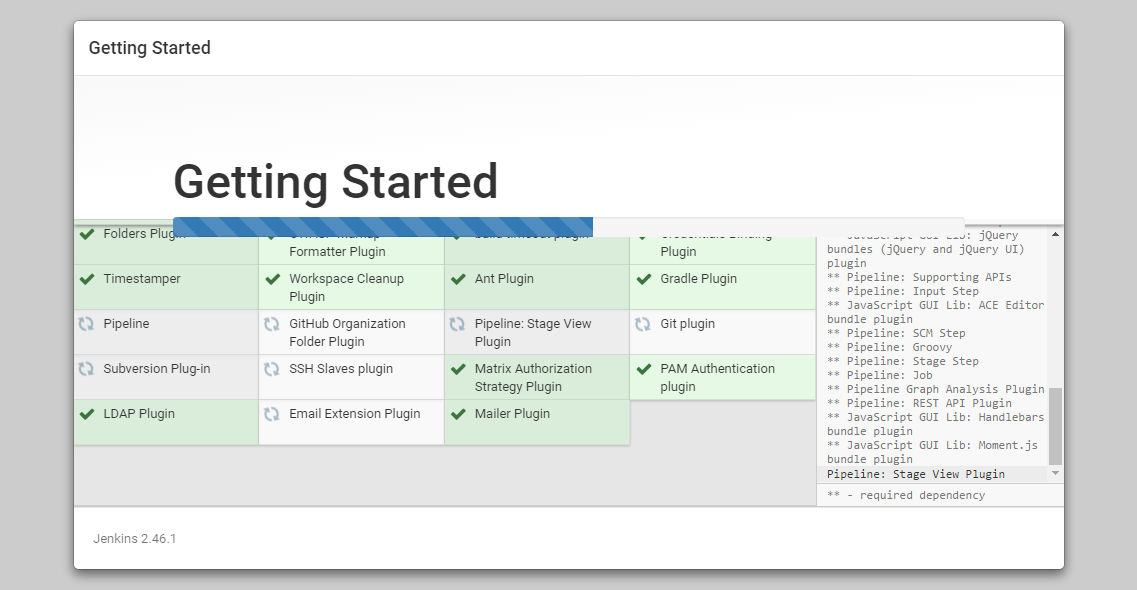
Jenkins Getting Started Install Plugins Screen
When the installation is complete, we'll be prompted to set up the first administrative user. It's possible to skip this step and continue as admin using the initial password we used above, but we'll take a moment to create the user.
Note: The default Jenkins server is NOT encrypted, so the data submitted with this form is not protected. When you're ready to use this installation, follow the guide How to Configure Jenkins with SSL using an Nginx Reverse Proxy. This will protect user credentials and information about builds that are transmitted via the Web interface.
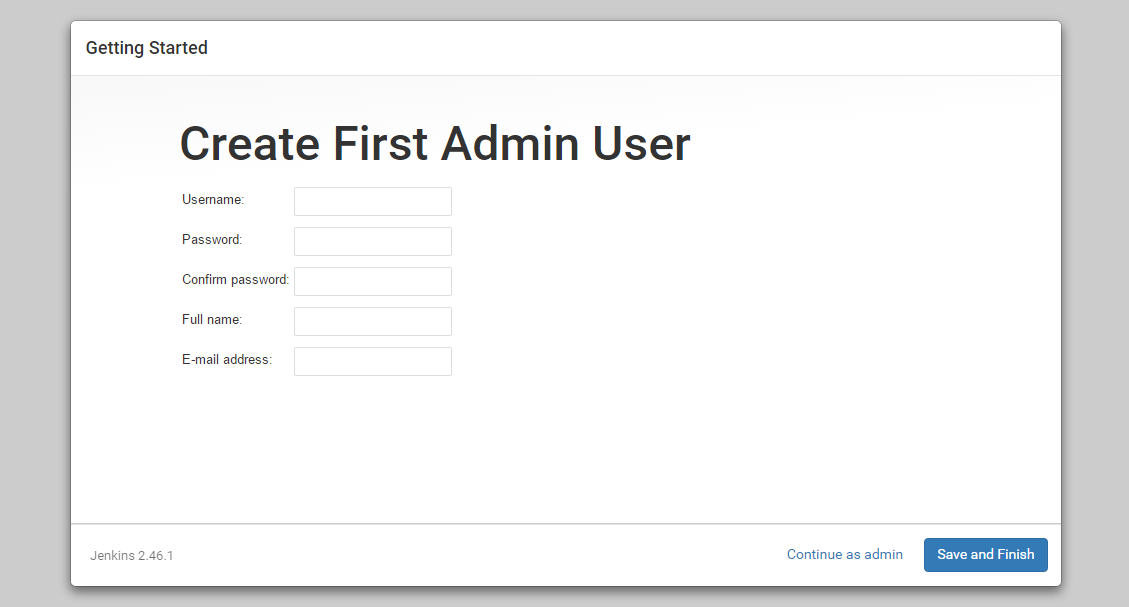
Jenkins Create First Admin User Screen
Once the first admin user is in place, you should see a "Jenkins is ready!" confirmation screen.
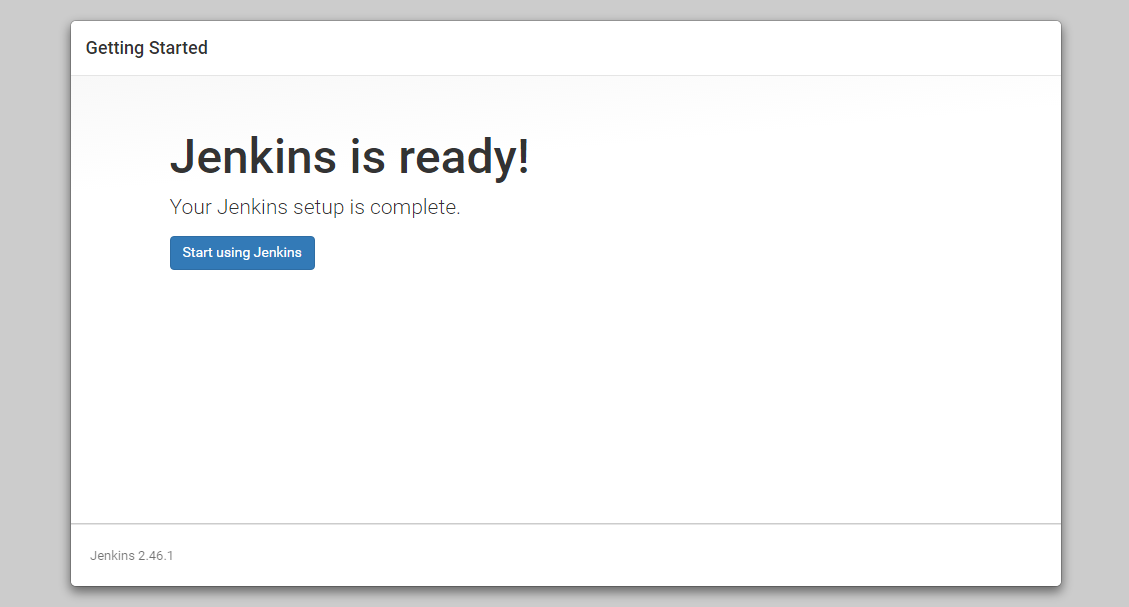
Jenkins is ready screen
Click "Start using Jenkins" to visit the main Jenkins dashboard:
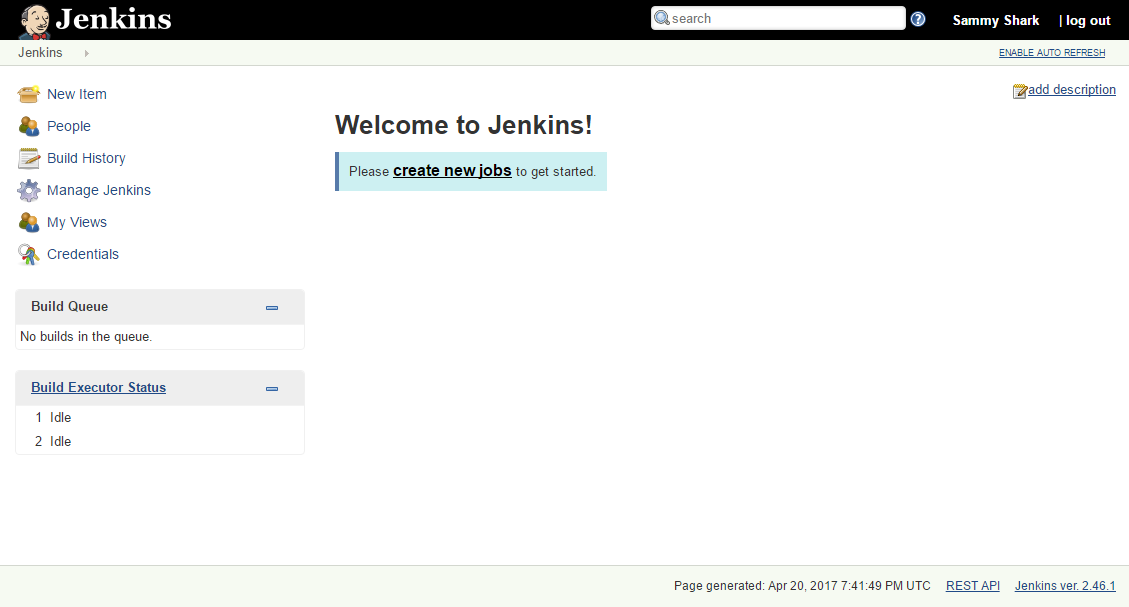
Welcome to Jenkins Screen
At this point, Jenkins has been successfully installed.

Conclusion

In this tutorial, we've installed Jenkins using the project-provided packages, started the server, opened the firewall, and created an administrative user. At this point, you can start exploring Jenkins.
When you've completed your exploration, if you decide to continue using Jenkins, follow the guide, How to Configure Jenkins with SSL using an Nginx Reverse Proxy in order to protect passwords, as well as any sensitive system or product information that will be sent between your machine and the server in plain text.


Source : https://www.digitalocean.com/community/tutorials/how-to-install-jenkins-on-ubuntu-16-04

Monday, October 9, 2017

delete AWS snapshots older than 30 days


#!/bin/sh
source /etc/profile
TODAYINSEC=$(gdate  +%s)
DATTOCOMPARE=$(date -v-30d +%s)
date > SNAP_TO_KEEP.txt
date > SNAP_TO_DELETE.txt

echo "Collecting snapshot information"

while read az; do
  echo "this is az "$az
                while read owner; do
               echo "this is owner "$owner
            aws ec2 describe-snapshots --region $az --owner-ids $owner --output json > listofsnaps.txt
            cat listofsnaps.txt | egrep "StartTime|SnapshotId" | awk -F'"' '{print $4}'  | awk 'NR%2{printf "%s, ",$0;next;}1' > listofsnaps.txt_tmp
            echo "listofsnaps for " $az "and owner" $owner "is ready"
                            while read snap
                            do
                            echo "working on snap " $snap
                            raw_date=`echo $snap | cut -d, -f1`
                            snap_date=`gdate -d $raw_date +%s`
                            echo "Snap date is: " $snap_date
                            echo "Snap to compare is: " $DATTOCOMPARE
                                      if [ $DATTOCOMPARE -gt $snap_date ]
                                      then
                                         echo $snap | cut -d, -f2 >> SNAP_TO_DELETE.txt
                                         snapToDelete=`echo $snap | cut -d, -f2`
                                         echo "Deleting Snapshot: " $snapToDelete
                                         #aws ec2 delete-snapshot --region $az --snapshot-id $snapToDelete
                                         echo "aws ec2 delete-snapshot --region" $az "--snapshot-id" $snapToDelete
                                      else
                                         echo $snap | cut -d, -f2 >> SNAP_TO_KEEP.txt
                                      fi
                            done < listofsnaps.txt_tmp
              done <owner-list.txt
done <az-list.txt

Thursday, May 11, 2017

How to get all your AWS snapshots using one command and AWS CLI


In case there is a need to view all the available snapshots from all of your account, for all of the availability zone using one command, this is how to do it.

create the owner-list.txt file which contain all of your AWS accounts number, each account should be in a line, for example

# cat owner-list.txt
483426017123 
487214417321


then create az-list.txt file, with the following availability zones

# cat az-list.txt
us-east-1 
us-east-2 
us-west-1 
us-west-2 
ca-central-1 
eu-west-1
eu-central-1
eu-west-2 
ap-southeast-1 
ap-southeast-2 
ap-northeast-2 
ap-northeast-1 
ap-south-1 
sa-east-1


now create the script itself


#cat get-snapshot.sh
while read az; do  
echo $az 
while read owner; do 
echo $owner 
aws ec2 describe-snapshots --region $az --owner-ids $owner --output json > $owner.$az.json 
done <owner-list.txt 
done <az-list.txt


the output will be list of json files, for each AZ and account.


Sunday, November 27, 2016

MSSQL (SQL) on Ubuntu Linux - The easy way


Hi

follow the next steps to install MSSQL (SQL) on Ubuntu 16.04 LTS Linux machine.

NOTE: please make sure that the machine which you are about to install MSSQL server on it have got at least 4GB of RAM, otherwise installation will fail.


1. Import the public repository GPG keys:

# wget https://packages.microsoft.com/keys/microsoft.asc --no-check-certificate
apt-key add microsoft.asc

2. Add the Microsoft SQL Server to Ubuntu repository:

echo "deb [arch=amd64] http://packages.microsoft.com/ubuntu/16.04/mssql-server xenial main" > /etc/apt/sources.list.d/mssql-server.list

3. update the source repository and install MSSQL

#sudo apt-get update
#sudo apt-get install -y mssql-server

4. After the package installation finishes, run the configuration script:

# sudo /opt/mssql/bin/sqlservr-setup


5. Type "YES" to accept the license terms.

6. Enter a password for the system administrator (SA) account, then confirm the password for the system administrator (SA) account.
 Make sure to specify a strong password for the SA account (Minimum length 8 characters, including uppercase and lowercase letters, base 10 digits and/or non-alphanumeric symbols).


7. After setup completed successfully, start the MSSQL service:

#systemctl start mssql-server

8. You may check the service status by typing: 

#systemctl status mssql-server


now that the service is up and running, you may connect to the database and manage it using SQL Server Management Studio using the SA username \ password.


here it is, a MSSQL server running on Linux machine !


Wednesday, October 26, 2016

windows activation failed on error 0x8007232b


When attempting to activate a volume-licensed copy of one of the followings: 

Windows 10 Pro or Enterprise
Windows 8.x Pro or Enterprise
Windows 7 Enterprise
Windows Vista Enterprise
Windows Vista Business
Windows Server 2012
Windows Server 2012 R2
Windows Server 2008
Windows Server 2008 R2

you may receive an error similar to the following:

Activation Error: Code 0x8007232b
DNS Name does not exist


Windows could not be activated.
Key management services (KMS) host could not be located in domain name system (DNS), please have your system administrator verify that a KMS is published correctly in DNS.
Error: 0x8007232b
Description:
DNS name does not exist.


In order to solve it:

  • Click Start, click All Programs, click Accessories, right-click Command Prompt, and then click Run as administrator. If you are prompted for an administrator password or for confirmation, type the password or provide confirmation.
After you've successfully opened the administrative command prompt, type the following command, and then press Enter:

slmgr -ipk xxxxx-xxxxx-xxxxx-xxxxx-xxxxx
Note The xxxxx-xxxxx-xxxxx-xxxxx-xxxxx placeholder represents your MAK product key.


source1: https://support.microsoft.com/en-us/kb/3166553
source2: http://www.dell.com/support/article/us/en/04/SLN249706

Tuesday, October 18, 2016

How to run a batch script on virtual machine using vmware tools


Here is an example of how to run a batch script on virtual machine using vmware tools.

in this example the batch script will query the "Remote Desktop Services" (TermService) service.


* you will have to download VMware PowerCLI

1. execute VMware PowerCLI.
2. Connect to the VC using the following command:
Connect-VIServer -Server %VCNAME% -User %USERNAME% -Password %PASSWORD%

3. Run the following via PowerCLI (Define the script which about to be executed).
 $script = 'sc query TermService'

4. Run the following via PowerCLI

Invoke-VMScript -Scripttype bat -ScriptText $script -VM $VMNAME$


Tuesday, September 27, 2016

hung_task_timeout_secs and blocked for more than 120 seconds problem


Hi

Today we experienced an issue on Debian server, the file system hanged external mounts failed.

We saw "hung_task_timeout_secs" errors in /var/log/syslog:


INFO: task jbd2/dm-47-8:6937 blocked for more than 120 seconds.
"echo 0 > /proc/sys/kernel/hung_task_timeout_secs" disables this message.
jbd2/dm-47-8  D 000000000000000b     0  6937      2 0x00000080
 ffff8a1fd1363d20 0000000000000046 0000000000016700 0000000000016700
 ffff8a1fd34bd800 0000000000016700 0000000000016700 ffff8a1fd0493540
 ffff8a1fd0493af8 ffff8a1fd1363fd8 000000000000fb88 ffff8a1fd0493af8
Call Trace:
 [<ffffffff81096f8e>] ? prepare_to_wait+0x4e/0x80
 [<ffffffffa025a7cf>] jbd2_journal_commit_transaction+0x19f/0x14b0 [jbd2]
 [<ffffffff810096f0>] ? __switch_to+0xd0/0x320
 [<ffffffff8105e759>] ? find_busiest_queue+0x69/0x150
 [<ffffffff81080fcc>] ? lock_timer_base+0x3c/0x70
 [<ffffffff81096ca0>] ? autoremove_wake_function+0x0/0x40
 [<ffffffffa0260f38>] kjournald2+0xb8/0x220 [jbd2]
 [<ffffffff81096ca0>] ? autoremove_wake_function+0x0/0x40
 [<ffffffffa0260e80>] ? kjournald2+0x0/0x220 [jbd2]
 [<ffffffff81096936>] kthread+0x96/0xa0
 [<ffffffff8100c0ca>] child_rip+0xa/0x20
 [<ffffffff810968a0>] ? kthread+0x0/0xa0
 [<ffffffff8100c0c0>] ? child_rip+0x0/0x20
Kernel panic - not syncing: hung_task: blocked tasks


These  messages related to hardware failure or a software bug in the operating system: “A kernel may also go into panic() if it is unable to locate a root file system. 
During the final stages of kernel userspace initialization, a panic is typically triggered if the spawning of init fails, as the system would then be unusable.”

The explanation for this is that by default Linux uses up to 40% of the available memory for file system caching. After this mark has been reached the file system flushes all outstanding data to disk causing all following IOs going synchronous. For flushing out this data to disk this there is a time limit of 120 seconds by default. In the case here the IO subsystem is not fast enough to flush the data withing 120 seconds. As IO subsystem responds slowly and more requests are served, System Memory gets filled up resulting in the above error.

Two possible solutions:
1. Change the I/O scheduler – not related to our problem since the hang wasn’t related to /root filesystem.
Here is a solution from Redhat https://access.redhat.com/solutions/408833

2. Configure the vm.dirty_ratio (20% default) and vm.dirty_backgroud_ratio (10% default) to smaller values (10 and 5) so dumping data to disk will be faster.

Here is how to do it:


Change vm.dirty_ratio and vm.dirty_backgroud_ratio
someuser@servercore [/home/someuser]$ sudo sysctl -w vm.dirty_ratio=10
someuser@servercore [/home/someuser]$ sudo sysctl -w vm.dirty_background_ratio=5
Commit Change
someuser@servercore [/home/someuser]# sudo sysctl -p

Make it permanent

When the server seemed more stable and no Kernel/Swap/Memory Panic for a week, I edited /etc/sysctl.conf file to make these permanent after reboot.
someuser@servercore [/home/someuser]$ sudo vi /etc/sysctl.conf
ADD 2 lines at the bottom
vm.dirty_background_ratio = 5
vm.dirty_ratio = 10
Save and exit.
someuser@servercore [/home/someuser]$ sudo reboot
Source: http://blog.ronnyegner-consulting.de/2011/10/13/info-task-blocked-for-more-than-120-seconds/comment-page-1/

Source 2: https://www.blackmoreops.com/2014/09/22/linux-kernel-panic-issue-fix-hung_task_timeout_secs-blocked-120-seconds-problem/

.